
These homemade Tiropitakia, traditional Greek cheese pies, bring the warmth of grandmother’s kitchen straight to your table in just 30 minutes.
With only 5 minutes of prep time, you’ll create 30 irresistibly crispy, cheese-filled pastries that make perfect sides for any meal.
This authentic Greek recipe features a vegetarian-friendly filling wrapped in flaky layers – just like the ones you’d find in Athens’ bustling street markets.
Simple yet sophisticated, these bite-sized delights prove that the most cherished family recipes don’t need to be complicated.
Classic Greek Tiropitakia Ingredients
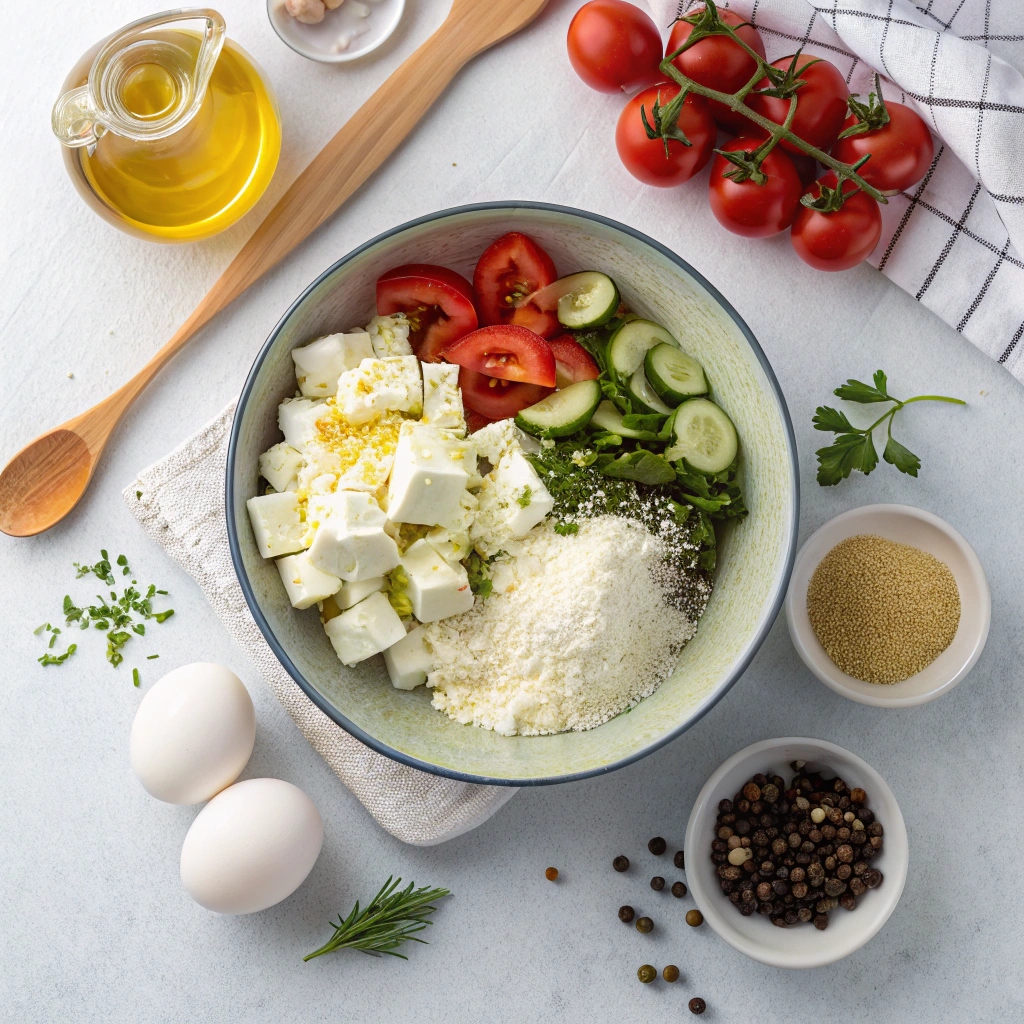
- Self-rising flour: 500g, provides the perfect fluffy texture
- Greek yogurt: 200g, ensures moisture and tanginess
- Oil blend: 200g total (100g each of olive oil and vegetable oil) for authentic Mediterranean flavor
- Feta cheese: 400-450g, crumbled fresh for the signature salty taste
- Eggs: 2 large, helps bind ingredients together
- Seasonings: Salt and pepper to taste, dried oregano optional for extra Greek flair
Step-by-Step Instructions
- Mix ingredients: Combine all ingredients in a spacious bowl until roughly mixed
- Knead dough: Gently work the mixture with your hands until you achieve a smooth, uniform dough
- Prepare baking sheet: Line your baking tray with parchment paper for easy removal
- Shape tiropitakia: Form approximately 30 evenly-sized balls from the dough
- Flatten shapes: Gently press each ball to create the classic tiropitakia shape
- Baking time: Place in preheated oven at 180°C for 25-30 minutes until golden brown and thoroughly cooked
Variations & Substitutions
Love these little cheese pies but want to try something different? You can swap the feta for a mix of cheeses – try adding some grated graviera or kefalograviera for extra flavor!
If you can’t find Greek yogurt, plain full-fat yogurt works great too. Want to make them extra special? Add a pinch of fresh chopped dill or mint to the filling – it adds such a lovely fresh taste!
Serving Suggestions
These warm, cheesy tiropitakia are perfect as a snack or light meal! Serve them fresh from the oven with a crisp Greek salad on the side.
They’re amazing for breakfast too – just pair them with sliced tomatoes and cucumber. Planning a party?
Place them on a big platter with some olives and they’ll disappear in minutes! For an extra touch, drizzle a tiny bit of honey on top just before serving – it’s a magical combo!
Storage Tips
Your tiropitakia will stay fresh in an airtight container in the fridge for up to 3 days. Want to save some for later?
Let them cool completely, then pop them in a freezer bag – they’ll keep for up to 2 months!
When you’re ready to eat them, just warm them in the oven at 350°F (180°C) for about 10 minutes until they’re heated through. They’ll taste just as good as fresh-baked!

Grandma’s Tiropitakia (cheese pies)
Ingredients
Equipment
Method
- To prepare this super easy tiropitakia recipe add all the ingredients in a large bowl.
- Mix the ingredients using a spoon until almost incorporated.
- Knead a little bit with your hands until you have a smooth dough.
- Line a large baking tray with parchment paper.
- Form the dough in round balls and place on the parchment paper. (about 30 tiropitakia)
- Flatten a little bit the tiropitakia with your hands.
- Bake in preheated oven at 180C for about 25-30 min, depending on the oven, until nicely coloured and cooked through. Enjoy!